
1. 网页灯笼
1.1 灯笼效果

网页左右两端各两个灯笼,但只能在PC端显示
1.2 灯笼代码
<style>
    .ct2 .mn {width:770px;}.ct2 .sd {width:218px;}
</style>
<div id="wp" class="wp">
    <div class="xnkl">
        <div class="deng-box2">
            <div class="deng">
                <div class="xian">
                </div>
                <div class="deng-a">
                    <div class="deng-b">
                        <div class="deng-t">
                            度
                        </div>
                    </div>
                </div>
                <div class="shui shui-a">
                    <div class="shui-c">
                    </div>
                    <div class="shui-b">
                    </div>
                </div>
            </div>
        </div>
        <div class="deng-box3">
            <div class="deng">
                <div class="xian">
                </div>
                <div class="deng-a">
                    <div class="deng-b">
                        <div class="deng-t">
                            欢
                        </div>
                    </div>
                </div>
                <div class="shui shui-a">
                    <div class="shui-c">
                    </div>
                    <div class="shui-b">
                    </div>
                </div>
            </div>
        </div>
        <div class="deng-box1">
            <div class="deng">
                <div class="xian">
                </div>
                <div class="deng-a">
                    <div class="deng-b">
                        <div class="deng-t">
                            春
                        </div>
                    </div>
                </div>
                <div class="shui shui-a">
                    <div class="shui-c">
                    </div>
                    <div class="shui-b">
                    </div>
                </div>
            </div>
        </div>
        <div class="deng-box">
            <div class="deng">
                <div class="xian">
                </div>
                <div class="deng-a">
                    <div class="deng-b">
                        <div class="deng-t">
                            新
                        </div>
                    </div>
                </div>
                <div class="shui shui-a">
                    <div class="shui-c">
                    </div>
                    <div class="shui-b">
                    </div>
                </div>
            </div>
        </div>
    </div>
    <style type="text/css">
        @media screen and (max-width: 768px) {.xnkl{display:none; }}.deng-box
        { position: fixed; top: -40px; right: 150px; z-index: 9999; pointer-events:
        none;}.deng-box1 { position: fixed; top: -30px; right: 10px; z-index: 9999;
        pointer-events: none}.deng-box2 { position: fixed; top: -40px; left: 150px;
        z-index: 9999; pointer-events: none}.deng-box3 { position: fixed; top:
        -30px; left: 10px; z-index: 9999; pointer-events: none}.deng-box1 .deng,.deng-box3
        .deng { position: relative; width: 120px; height: 90px; margin: 50px; background:
        #d8000f; background: rgba(216,0,15,.8); border-radius: 50% 50%; -webkit-transform-origin:
        50% -100px; -webkit-animation: swing 5s infinite ease-in-out; box-shadow:
        -5px 5px 30px 4px #fc903d}.deng { position: relative; width: 120px; height:
        90px; margin: 50px; background: #d8000f; background: rgba(216,0,15,.8);
        border-radius: 50% 50%; -webkit-transform-origin: 50% -100px; -webkit-animation:
        swing 3s infinite ease-in-out; box-shadow: -5px 5px 50px 4px #fa6c00}.deng-a
        { width: 100px; height: 90px; background: #d8000f; background: rgba(216,0,15,.1);
        margin: 12px 8px 8px 8px; border-radius: 50% 50%; border: 2px solid #dc8f03}.deng-b
        { width: 45px; height: 90px; background: #d8000f; background: rgba(216,0,15,.1);
        margin: -4px 8px 8px 26px; border-radius: 50% 50%; border: 2px solid #dc8f03}.xian
        { position: absolute; top: -20px; left: 60px; width: 2px; height: 20px;
        background: #dc8f03}.shui-a { position: relative; width: 5px; height: 20px;
        margin: -5px 0 0 59px; -webkit-animation: swing 4s infinite ease-in-out;
        -webkit-transform-origin: 50% -45px; background: orange; border-radius:
        0 0 5px 5px}.shui-b { position: absolute; top: 14px; left: -2px; width:
        10px; height: 10px; background: #dc8f03; border-radius: 50%}.shui-c { position:
        absolute; top: 18px; left: -2px; width: 10px; height: 35px; background:
        orange; border-radius: 0 0 0 5px}.deng:before { position: absolute; top:
        -7px; left: 29px; height: 12px; width: 60px; content: " "; display: block;
        z-index: 999; border-radius: 5px 5px 0 0; border: solid 1px #dc8f03; background:
        orange; background: linear-gradient(to right,#dc8f03,orange,#dc8f03,orange,#dc8f03)}.deng:after
        { position: absolute; bottom: -7px; left: 10px; height: 12px; width: 60px;
        content: " "; display: block; margin-left: 20px; border-radius: 0 0 5px
        5px; border: solid 1px #dc8f03; background: orange; background: linear-gradient(to
        right,#dc8f03,orange,#dc8f03,orange,#dc8f03)}.deng-t { font-family: 黑体,Arial,Lucida
        Grande,Tahoma,sans-serif; font-size: 3.2rem; color: #dc8f03; font-weight:
        700; line-height: 85px; text-align: center}.night .deng-box,.night .deng-box1,.night
        .deng-t { background: 0 0!important}@-moz-keyframes swing { 0% { -moz-transform:
        rotate(-10deg) } 50% { -moz-transform: rotate(10deg) } 100% { -moz-transform:
        rotate(-10deg) }}@-webkit-keyframes swing { 0% { -webkit-transform: rotate(-10deg)
        } 50% { -webkit-transform: rotate(10deg) } 100% { -webkit-transform: rotate(-10deg)
        }}
    </style>
1.3 使用方法
插入自定义html区块,粘贴代码进去即可


2. 彩色标签云
2.1 彩色标签云效果
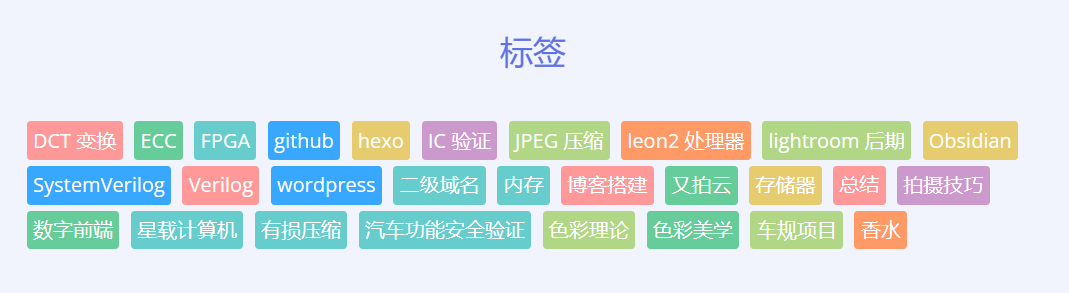
2.2 美化代码
//圆角背景色标签
function colorCloud($text) {
$text = preg_replace_callback('|<a (.+?)>|i', 'colorCloudCallback', $text);
return $text;
}
function colorCloudCallback($matches) {
$text = $matches[1];
$colors = array('F99','C9C','F96','6CC','6C9','37A7FF','B0D686','E6CC6E');
$color=$colors[dechex(rand(0,7))];
$pattern = '/style=('|")(.*)('|")/i';
$text = preg_replace($pattern, "style="display: inline-block; *display: inline; *zoom: 1; color: #fff; padding: 1px 5px; margin: 0 5px 5px 0; background-color: #{$color}; border-radius: 3px; -webkit-transition: background-color .4s linear; -moz-transition: background-color .4s linear; transition: background-color .4s linear;"", $text);
$pattern = '/style=('|")(.*)('|")/i';
return "<a $text>";
}
add_filter('wp_tag_cloud', 'colorCloud', 1);
2.3 使用方法
在当前主题目录下面的functions.php里面加入以下代码
注:颜色可以自己对照rgb颜色表修改
$colors = array('F99','C9C','F96','6CC','6C9','37A7FF','B0D686','E6CC6E');3. 文字输入撒花特效
3.1 实现效果
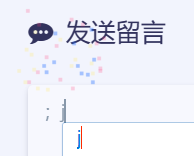
3.2 美化代码
<!--网站输入效果开始-->
<script src="https://fastly.jsdelivr.net/gh/huangwb8/bloghelper@latest/js/input-with-fire.js"></script>
3.3 使用方法
在主题的footer.php文件中的末尾</body>上方加入代码
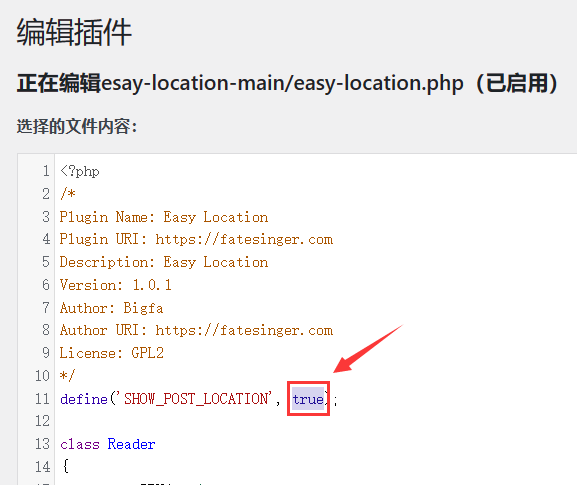
4. 添加位置标识
4.1 实现效果
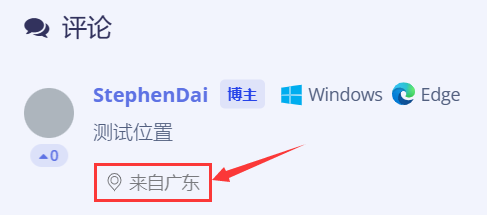
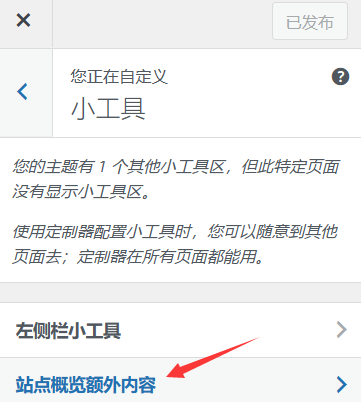
4.2 使用方法
Github上搜索easy location,下载安装包,然后在wp后台上传插件安装包。然后通过插件文件编辑器,修改php文件中的false为true,保存即可。
5. 时钟插件
5.1 美化效果
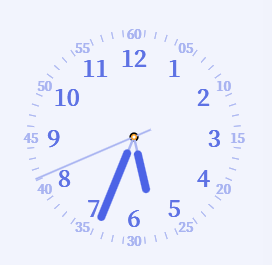
5.2 html代码(右键另存为html)
6. 鼠标指针特效
6.1 美化代码&使用方法
Docker系列 WordPress系列 特效 – Bensz (hwb0307.com)
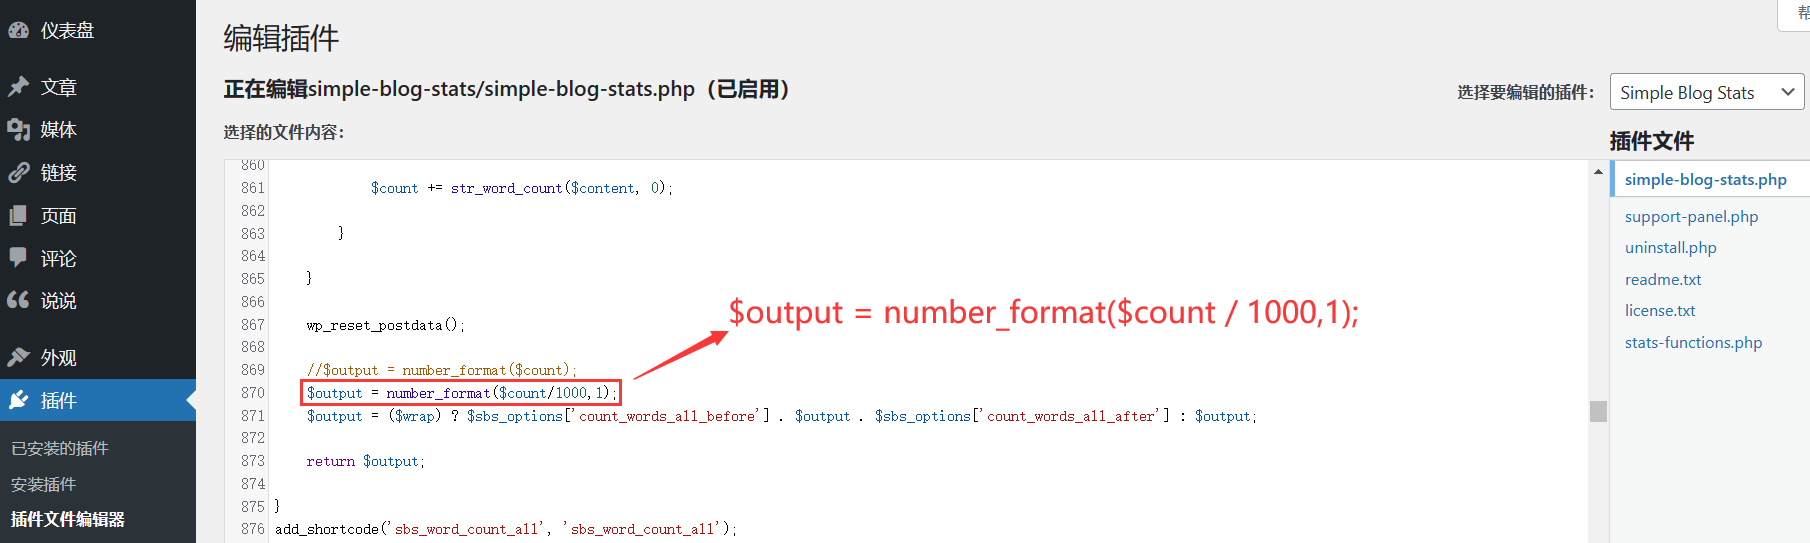
7. 全站字数统计(保留一位小数)
7.1 美化效果

7.2 修改方法
下载Simple Blog Stats插件,修改插件代码如下。(注,更新插件后需要重新修改代码)
8.自助友链申请
wordpress优化&修改经历(三)——自助友链申请实现_自助友链html代码_不愿意做鱼的小鲸鱼的博客-CSDN博客
参考来源:
两款网站新年灯笼代码,给你的网站添加喜庆[教程]_青鹿云的博客-CSDN博客
Docker系列 WordPress系列 特效 – Bensz (hwb0307.com)
bigfa/esay-location: so easy (github.com)
wordpress优化&修改经历(三)——自助友链申请实现_自助友链html代码_不愿意做鱼的小鲸鱼的博客-CSDN博客
来自广东


不错哎,收藏一下喽 (ฅ´ω`ฅ)
有些美化还是参考大佬的
互相学习,哈哈
5时钟插件怎么做的啊
你好你好,点进去https://dphweb.cn/wp-content/uploads/clock.html 右键另存为html代码(我是放在云端的),然后在[外观]→[小工具]→[左侧栏小工具],插入[自定义HTML代码]。直接插入大小可能很大,这里可以定义一个iframe框架,设置下高度,如果用的主题一样的话可以设成200左右,例如<iframe src=”xxxx.html” height=”201″>,把xxxx.html换成你保存html文件的路径与名字。
标签云代码插入进去怎么报错啊